I don’t write tech manuals. I know I should. When I go back to a website I’ve created to modify it, I spend way too much time familiarizing myself with how I built the dang thing in the first place. This wouldn’t be a problem if I had written a manual (or even just notes) for it in the first place.
Technical writing is a skill, one that you can learn. It’s a skill that will serve you best if you learn it early in your programming career.
But because I’m a chaos demon, I decided I’d start not by writing a manual for a website or a program but for by writing a knitting pattern. Mostly because I’ve been making up patterns for things I wanted to make for myself and if I didn’t write them down, I’d forget them. Then if I wanted to make them again in a year, I’d have to start again from the beginning.
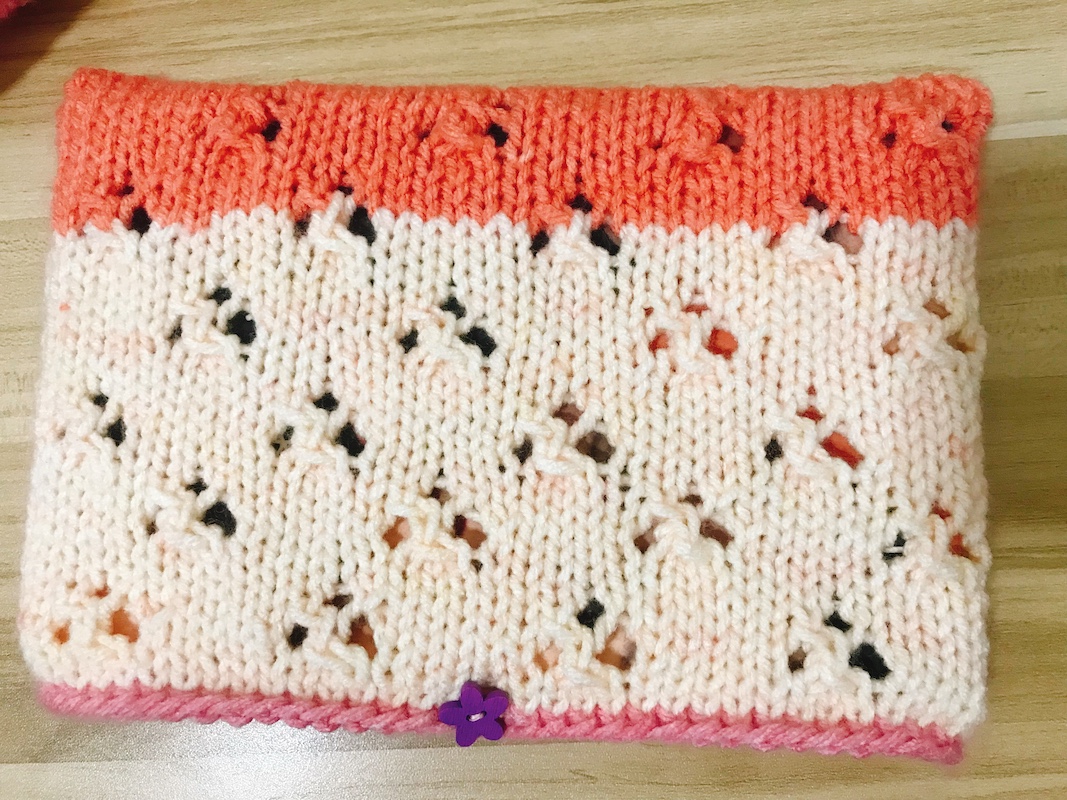
One thing I’ve been making is the book sleeve. Apparently, we don’t cover books in plastic anymore (yes I’m that old) so I needed a way to keep my paperbacks protected while I carry them around in my purse. The books in my collection come in different sizes, so I just made this in the size of most #RomanceClass novellas— 5″x8.5″. As for the yarn, I had a few cakes of Premier Sweet Roll in Peaches and Cream pop in my stash, most of which were in a baby blanket I was knitting, a project I’d abandoned a long time ago. I decided to use this yarn because I thought the color and texture would work great for a book sleeve I didn’t even bother frogging before I started, I just cut the working yarn and began there, frogging as needed whenever I needed to pull more working yarn.
I’d just recently learned how to do the Kitchener stitch, and I love it. It’s easy and saves me an extra step. Instead of casting off then sewing my seam, I just use the Kitchener stitch to do both cast-off and seam. Knitting the sleeve in the round meant I only needed to seam once.
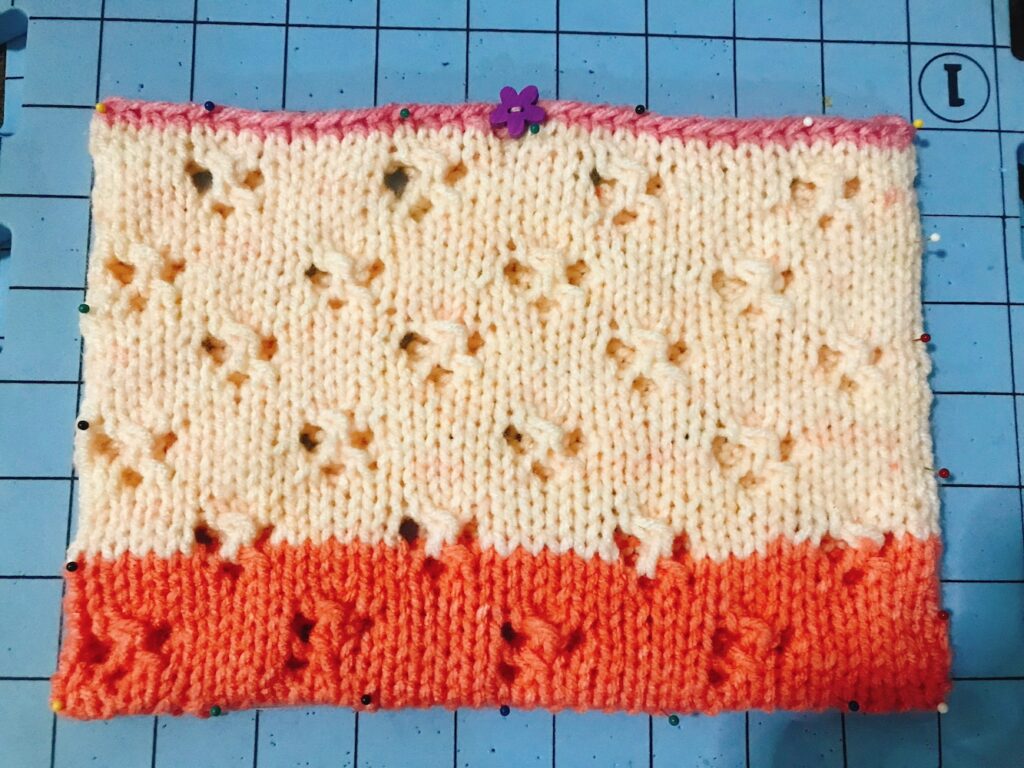
Right now, the sleeve is on my blocking mat, still wet. I also forgot to take photos of the project in different stages, so all I can give you is this (until I can make another one for photo-taking purposes).
So here’s the plan. I wrote up a draft of the pattern from my notes. This is Draft Verson 1. I’m going to make another one and taking photos of the progress. I’m thinking we’ll need photos of the following:
- Cast on
- Where to put the stitch markers
- Cast-off/seam
- The book sleeve with a book inside.
I also need to figure out the gauge, because (1) you’ll want to make sure your finished sleeve will fit your book and (2) it will let you make it with a different yarn if you can’t or don’t want to use the Premier Sweet Roll. It’s an acrylic yarn but if you prefer to use only natural fibers in your projects, you can use a wool yarn. This sleeve is meant to fit your book snugly so there’s a centimeter or so negative ease, which means the yarn needs to be stretchy, like wool or acrylic.
This is “Draft Version One” because it’s not finished. I have to double check the stitch and row counts (hence the need to make it again) and figure out the gauge. Once I have the final pattern, I’ll post it on another blog post.
(Pssst. You can subscribe to get updates when a new post is up.)
If you want to make this pattern, it would really help me if you post any questions you might have below in the comments section. It will let me know which parts of the pattern are unclear or wrong.
Cloverleaf Eyelet Book Sleeve – Draft Version 1
by Tania Arpa (all rights reserved)
You may not sell or reproduce this pattern (as-is or modified) anywhere. Feel free to sell any book sleeves you create using this pattern.
This is a booksleeve meant to fit a 5” x 8.5” paperback novella with a 0.3” to 0.4” thickness. It’s worked in the round, beginning at the opening. It’s cast off using the Kitchener stitch to seam the bottom. If you use yarn from a single ball or skein with no breaks, you will need to weave in only two ends.
Techniques/Stitches used:
- Cast-on in the round (I recommend the long-tail cast-on)
- Knit stitches
- Slip-slip-knit (SSK)
- Yarn over increases
- knit two, pass double decrease (SK2P)
- Cloverleaf eyelet knit in the round
- Kitchener stitch
Gauge:
(Will figure it out after I finish blocking)
Materials:
- 4.5 mm knitting needles, long dpns (at least 23 cm or 9 in.) or circular (80cm)
- Premier Sweet Roll (medium/worsted/size 4)
- Tapestry needle
- Stitch markers
- Small button (1.5cm diameter)
Cloverleaf eyelet pattern (in the round):
- Even Rnds 2-12: Knit.
- Rnd 1: Knit.
- Rnd 3: [K4, yo, sk2p, yo, k1]. Repeat [] to end.
- Rnd 5: [K5, yo, ssk, k1]. Repeat [] to end.
- Rnd 7: Knit.
- Rnd 9: *Yo, sk2p, yo, k5; rep from * to end.
- Rnd 11: *K1, yo, ssk, k5; rep from * to end.
- Rep Rnds 1-12 for pattern.
Directions:
- Cast on 68 stitches. Place a marker for the beginning of the row, and another marker between the first 34 stitches and the last 34 stitches (middle stitch marker: MSM).
- Rnd 1: K16, [yo, ssk] (this is your buttonhole), k16; move stitch marker to right needle; k17; place stitch marker (keep it here, don’t move it up the row— this is where you will sew your button); k17.
- Rnd 2 to 36: Cloverleaf eyelet pattern, but put an additional k1 at (1) beginning of each row, (2) before the middle stitch marker (MSM), (3) after the MSM, and (4) after the end of the row.
- Rnd 37: Knit.
- Distribute stitches evenly between two DPNs or if you’re using circular needles, between the two needles, using the MSM as your guide.
- Cut the yarn, leaving enough tail to seam the two edges with the Kitchener stitch, then seam.
- Sew the button where you put the button marker.
- Weave in edges. Block.
- Always insert the book spine-first to ensure the edges of the cover and pages don’t bend. Fasten the button.
© Tania Arpa 2023, All Rights Reserved • taniaarpa.com
Leave a Reply